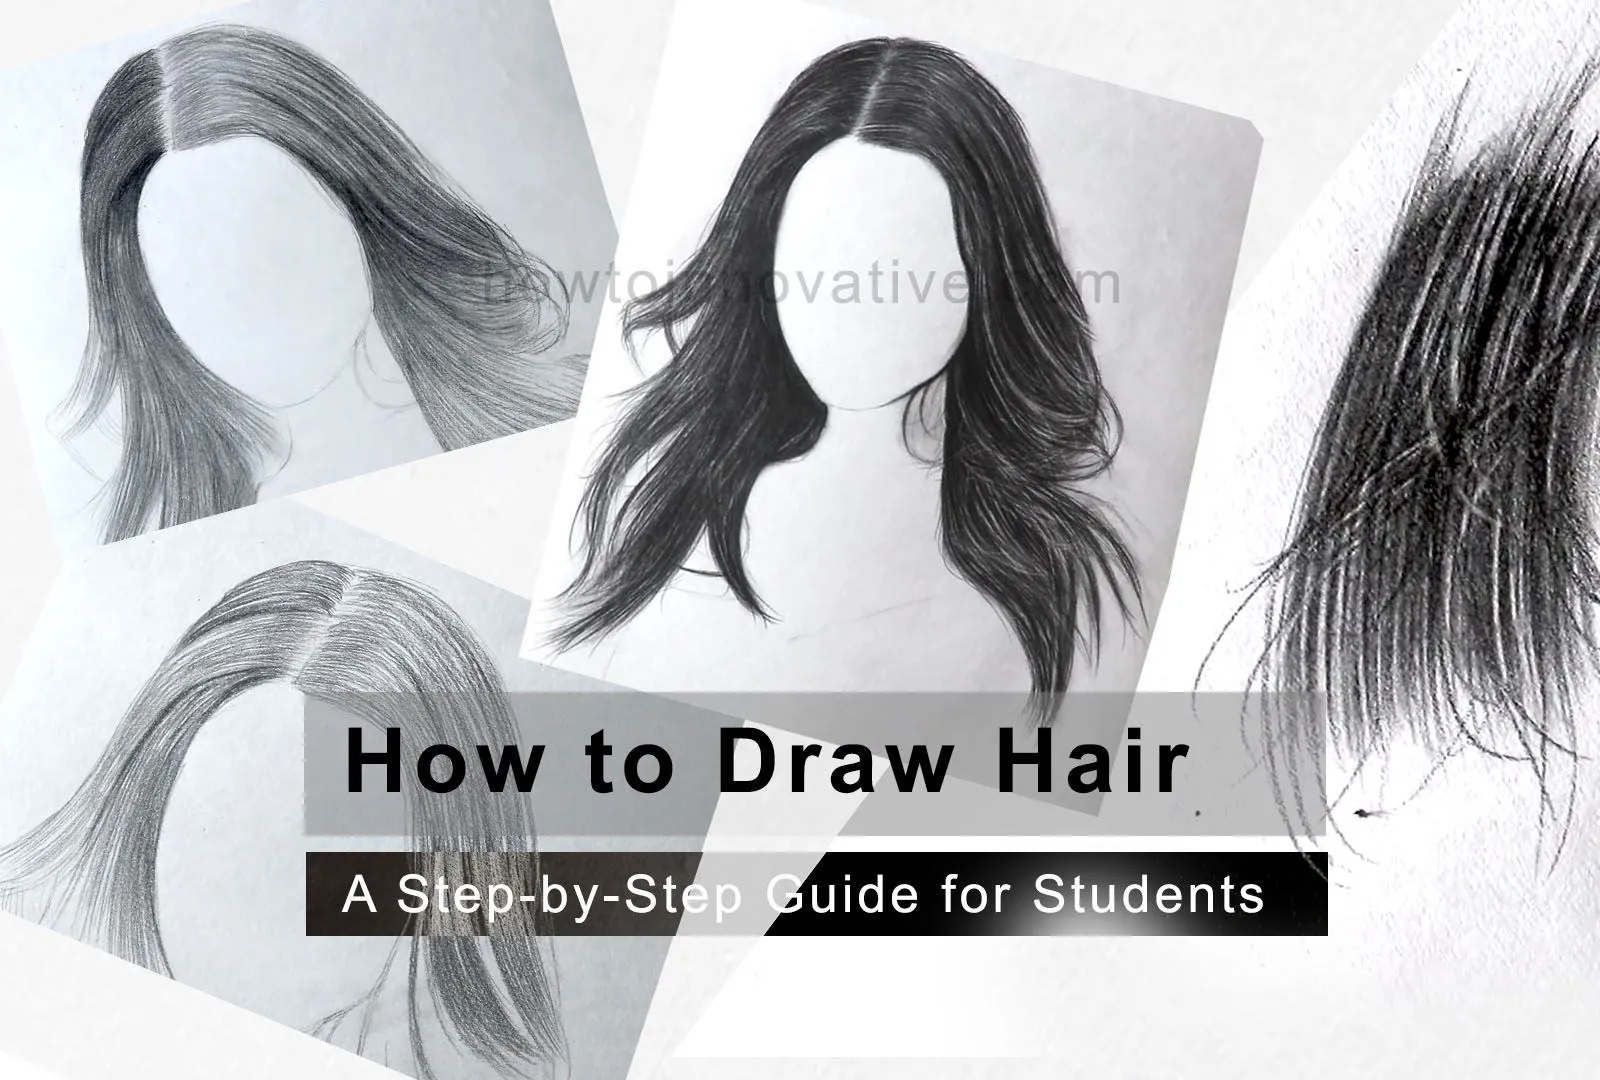
Drawing hair can be a difficult task for many budding artists. With its intricate details and complex textures, it often seems like an elusive skill to master. However, with practice and patience, anyone can learn to create stunning hair drawings that add life and realism to their artwork. In this step-by-step guide, we will explore techniques to help you capture the essence of different hair types, from flowing locks to intricate curls.
Table of Contents
Drawing hair can be challenging but with the right approach, it becomes an enjoyable part of creating a portrait. Here’s a simple guide to help you draw realistic hair.
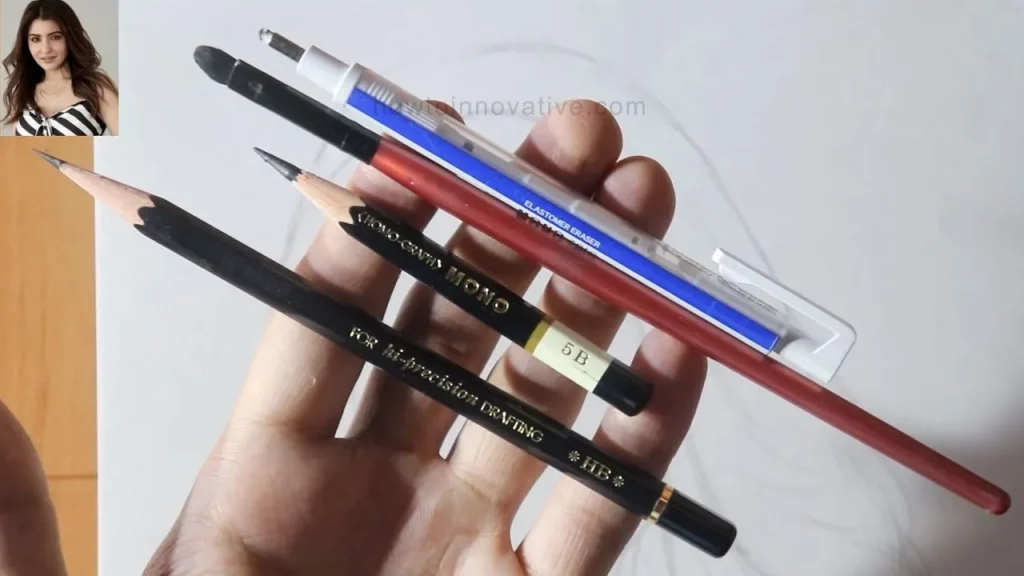
Step 1: Materials Needed for How to Draw Hair With Charcoal Pencil
Before you begin, make sure you have all the necessary materials:
- Sketchpad or drawing paper
- Pencils of varying hardness (HB, 2B, 4B, 5B, 6B)
- White color pencil
- Eraser
- Blending stump or tortillon
- Reference images of different hairstyles
Step 2: Study Your Reference Image and Understand the Basic Structure of Hair
Before we dive into the drawing process, it’s important to understand the basic structure of hair. Choose a reference image that showcases the type of hair you want to draw. Study the hair carefully, and pay attention to its texture, flow, and direction.
Hair strands are not straight and uniform; they have a natural wave or curl to them, and they often overlap and intertwine with one another. Note the highlights, shadows, and any distinctive features such as curls or waves.
Step 3: Sketching the Head
Start with a light sketch of the head. Use a simple oval shape to represent the skull and add guidelines for the facial features.
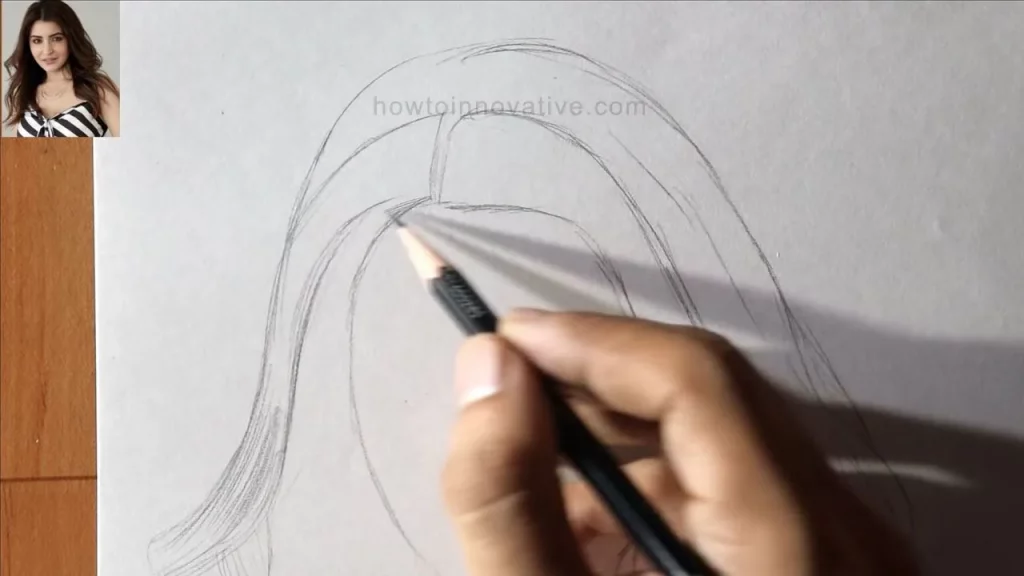
Step 4: Sketch the Basic Shape and Define the Hairline
Start by lightly sketching the basic shape of the hair using a 2B pencil. Focus on capturing the overall silhouette, including the outline of the head and the general direction of the hair strands. Don’t worry about adding details at this stage; the goal is to establish a foundation for your drawing.
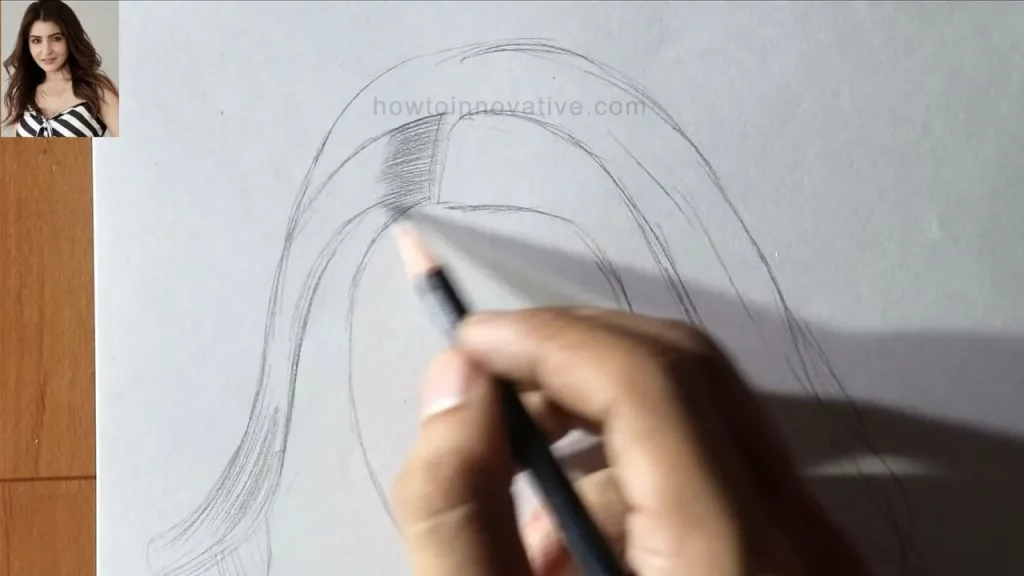
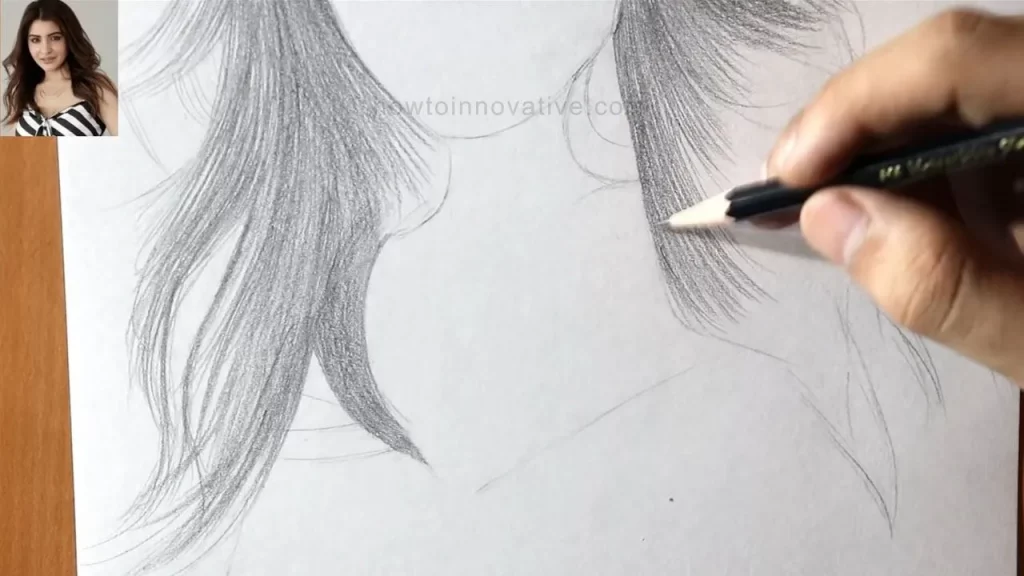
Step 5: Draw the Hair Strands
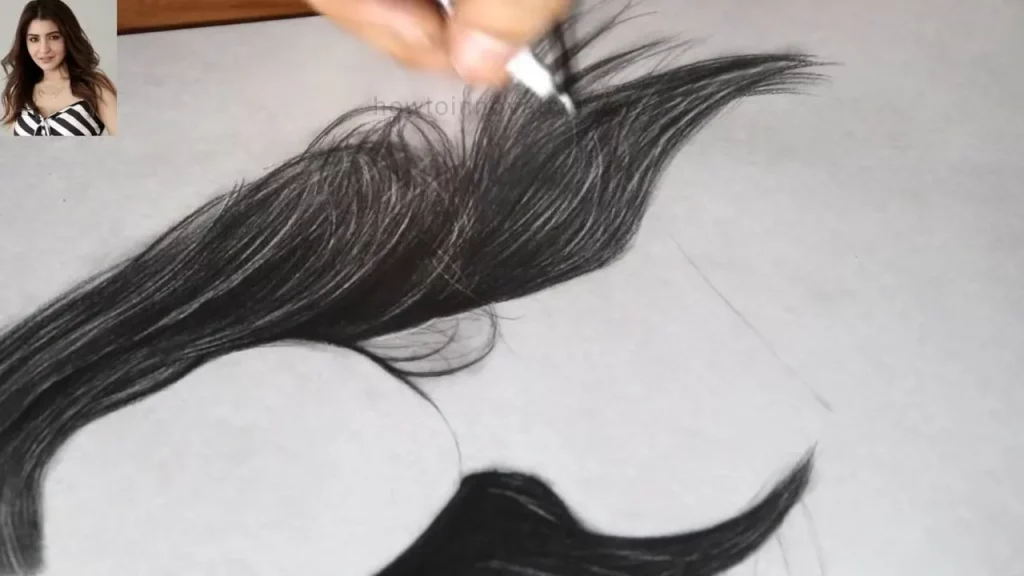
Using a slightly softer pencil (4B or 6B), begin adding individual hair strands. Pay close attention to the reference image and carefully observe the direction in which the hair flows. Use light, feathery strokes to create a sense of movement and volume. Remember that hair isn’t uniform, so vary the length and thickness of the strands for a more natural look.
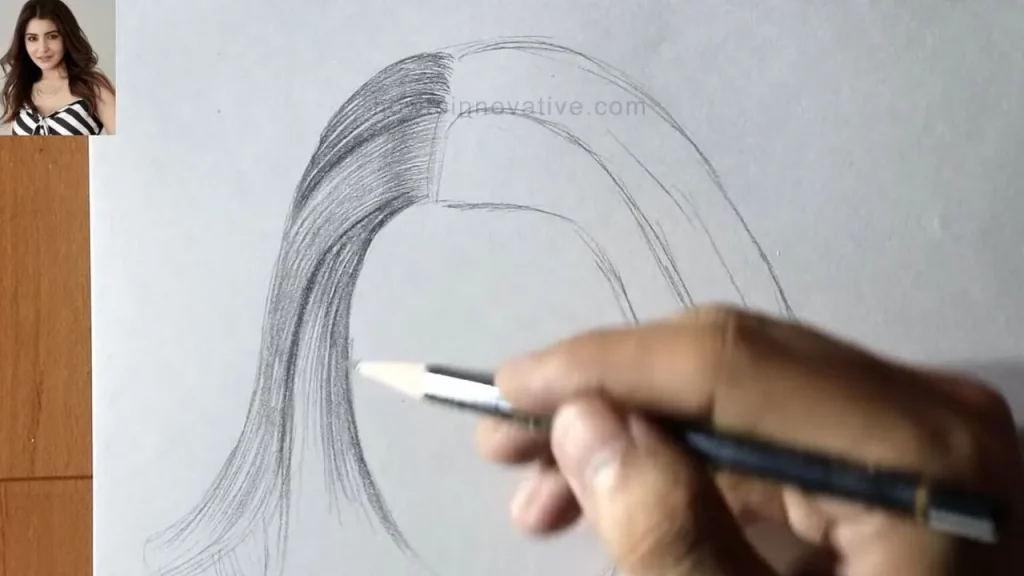
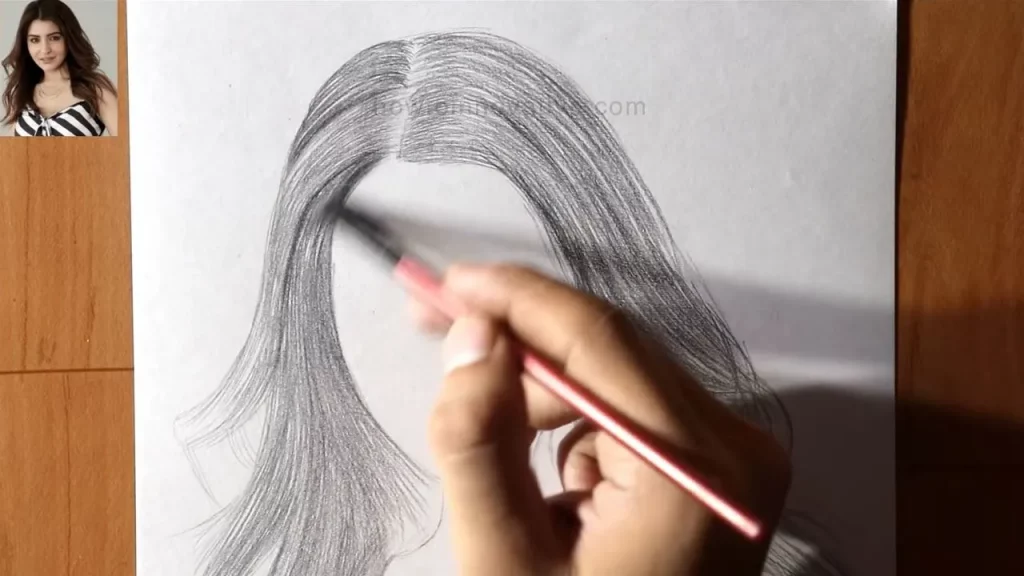
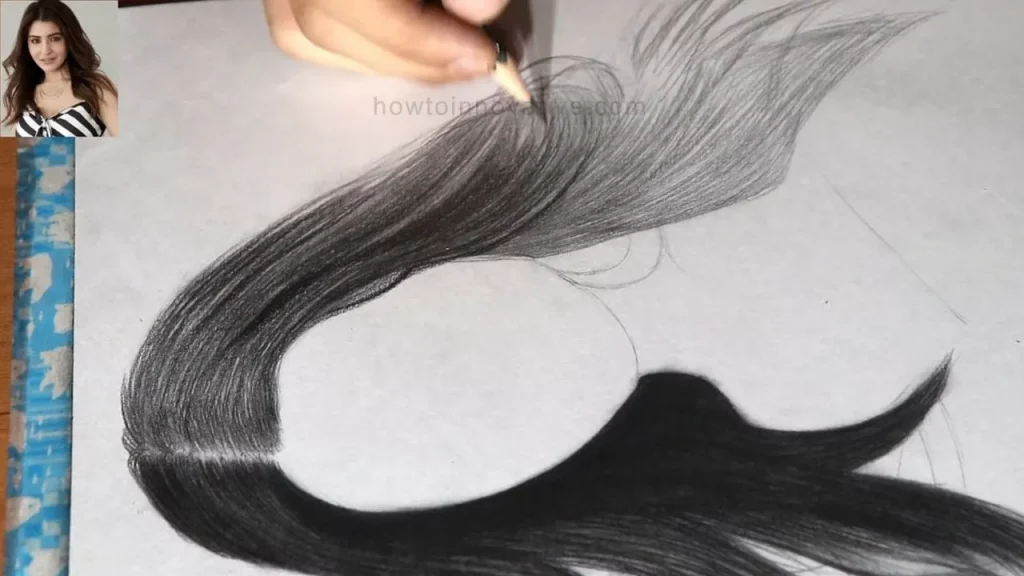
Step 6: Add Highlights and Shadows
To create a more realistic and three-dimensional look, identify the areas of highlights and shadows in your reference image. Lightly shade the shadowed areas using a softer pencil, gradually building up the darkness to create depth.
For highlights, use an eraser to gently lift off the graphite, creating subtle highlights that catch the light. Blend the transitions between light and shadow using a blending stump or tortillon for a smooth, seamless effect.
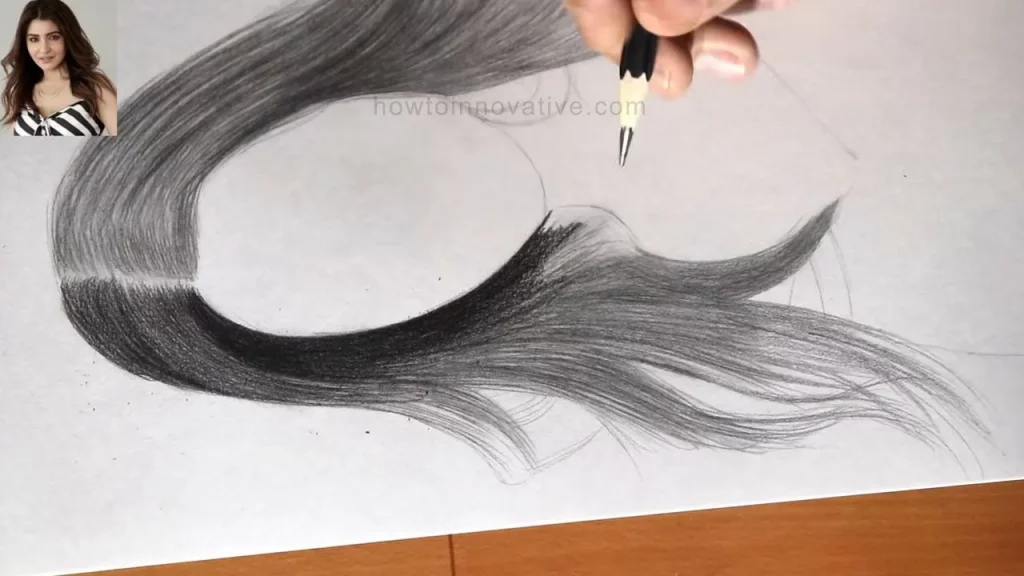
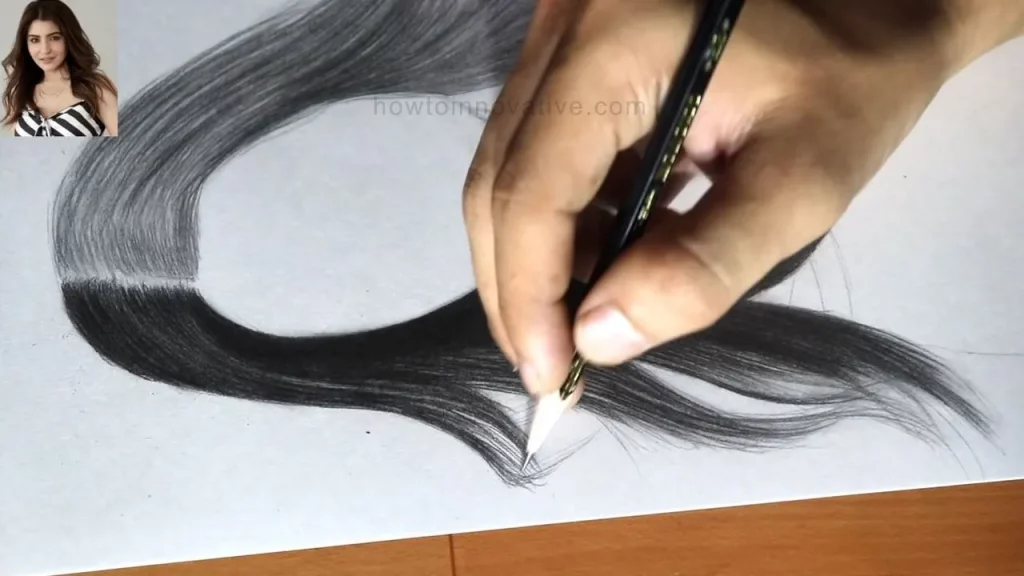
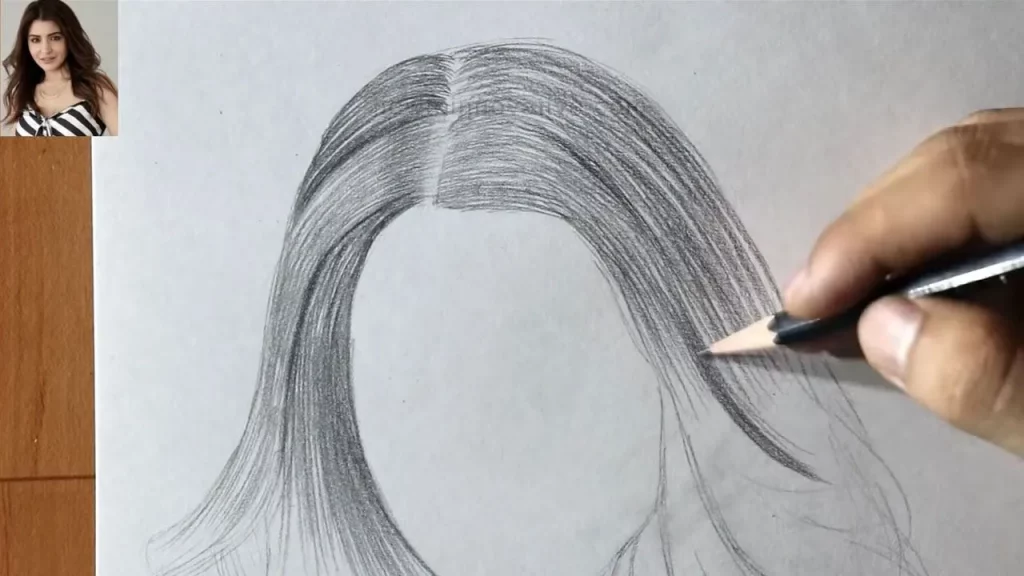
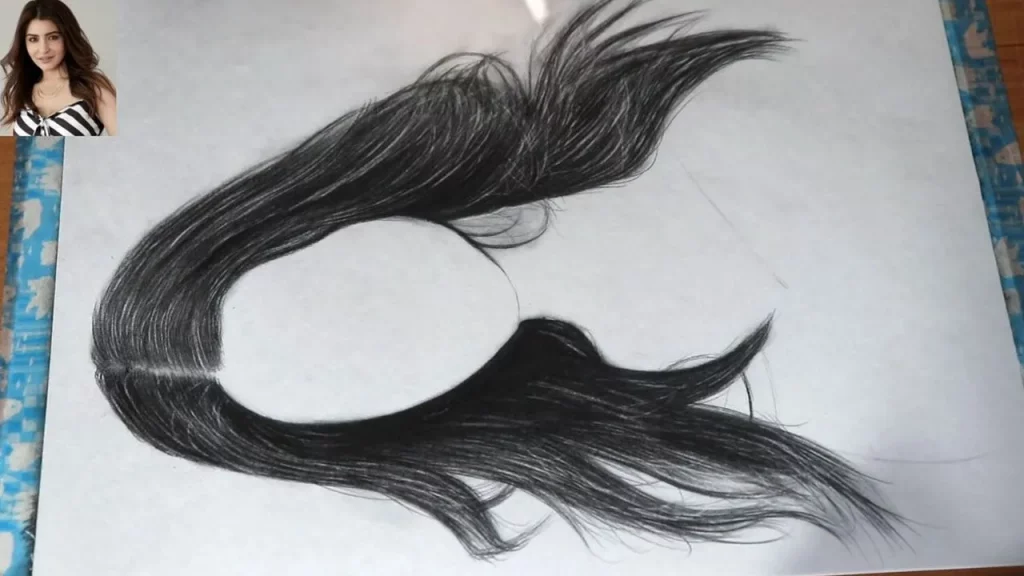
Step 7: Creating Volume
Hair has depth and volume. Make sure some strands overlap others and add space between groups of strands to create a three-dimensional effect.
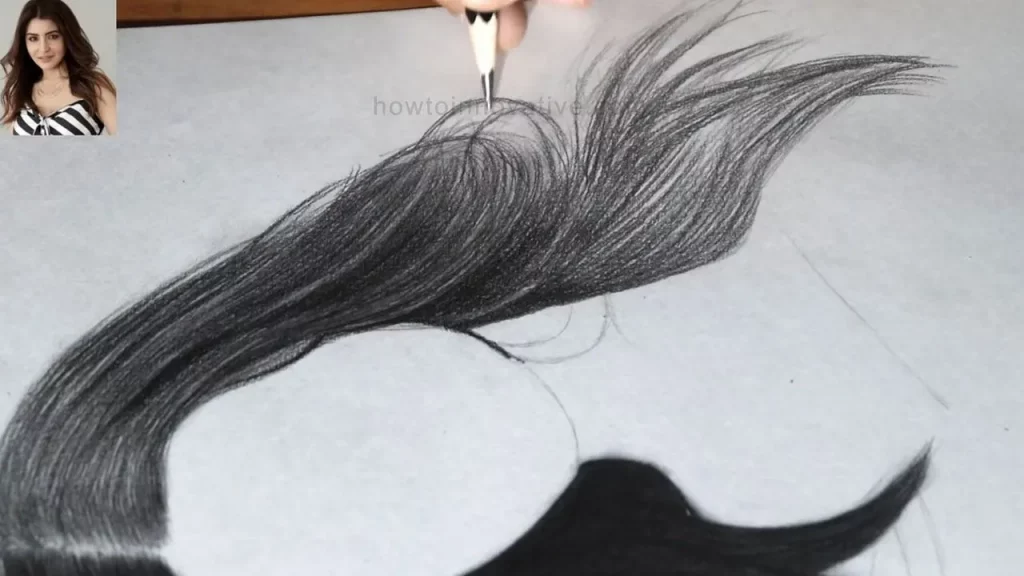
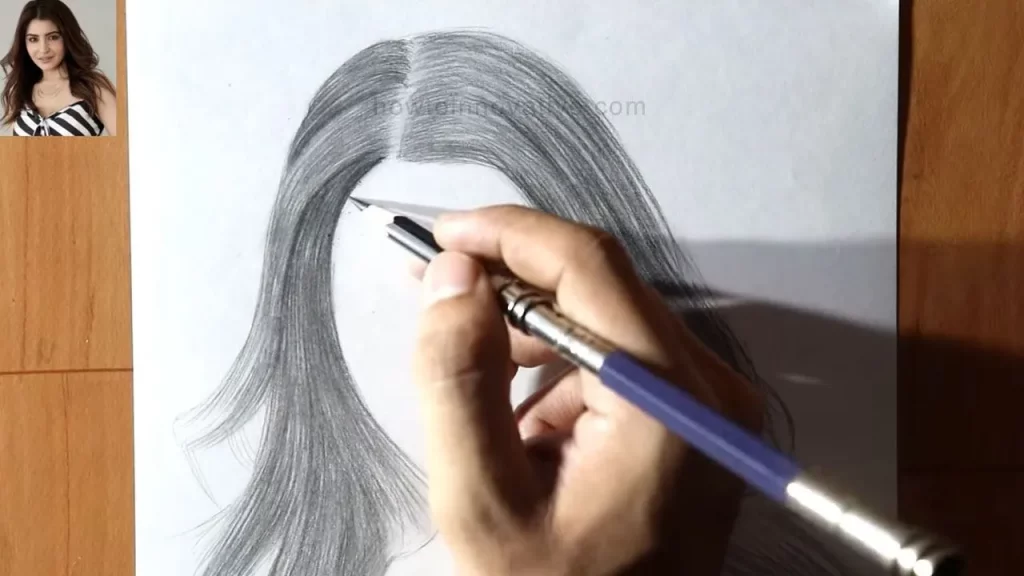
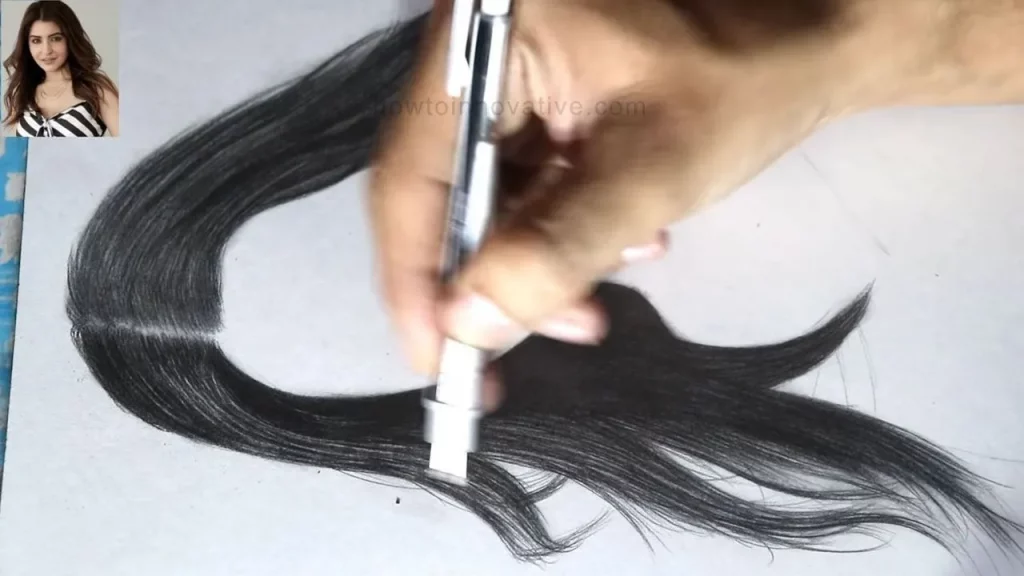
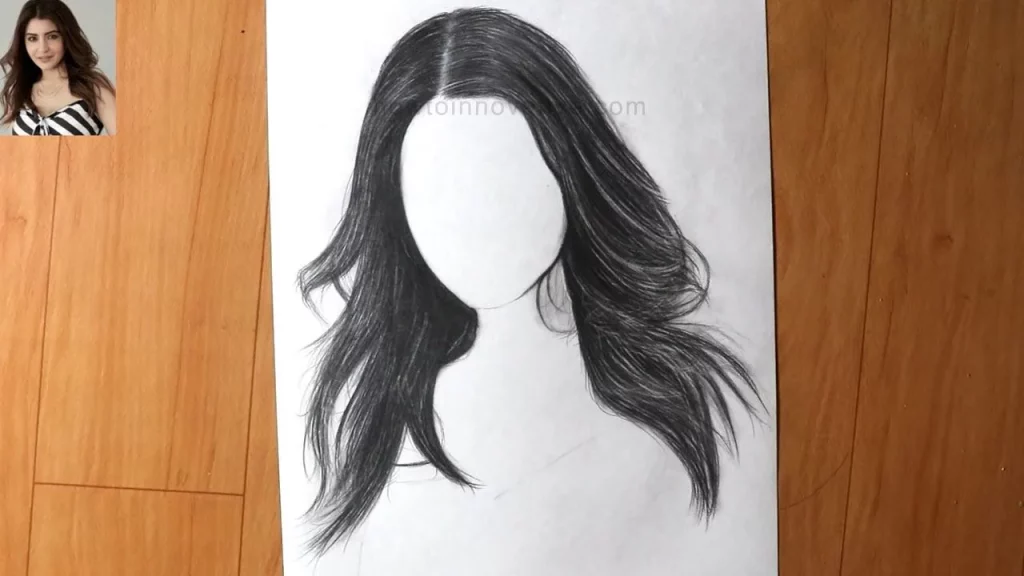
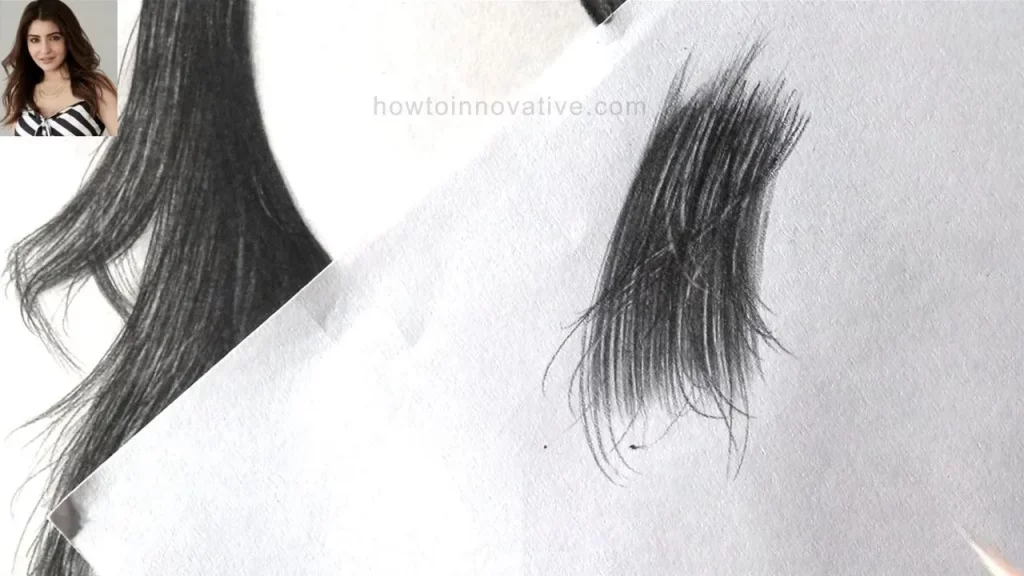
Step 8: Refine and Detail
Continue refining your drawing, adding more definition to individual strands, and paying attention to smaller details such as wisps of hair and flyaways. Take your time and work gradually, building up the texture and volume of the hair. Use an eraser to create lighter strands and a sharp pencil to define darker areas.
Use your eraser to clean up any stray lines or unwanted marks. Don’t be afraid to experiment with different techniques, such as cross-hatching or stippling, to achieve the desired effect.
Step 9: Final Touches
Once you’re satisfied with the overall look of your drawing, take a step back and assess it with a critical eye. Make any necessary adjustments to ensure the hair looks realistic and balanced. Add any final touches, such as stray hairs or subtle highlights, to enhance the overall appearance of the drawing.
Step 10: Practice, practice, practice
Drawing hair is a skill that takes time and practice to master, so don’t be discouraged if your first attempt doesn’t turn out exactly as you hoped. Keep experimenting with different techniques and styles and don’t be afraid to make mistakes – it’s all part of the learning process.
With dedication and persistence, you’ll soon find yourself creating stunning hair drawings that capture the beauty and complexity of this essential feature.
Conclusion
Drawing hair can be a challenging but rewarding process. By understanding the basic structure & flow of hair and following these step-by-step instructions, you can create realistic and visually appealing hair drawings.
Remember, practice regularly and experiment with different techniques to develop your unique style. Start with broad shapes and refine them into detailed strands. So grab your pencils and start drawing.